How to Use Google Wallet – Complete Setup and Payment Guide
Google Wallet is a digital wallet application designed for Android devices that enables contactless payments through NFC technology. The app stores credit and debit cards, loyalty cards, transit passes, and digital tickets in one place. Originally launched in 2008, the service underwent significant changes and now serves as the primary digital payment solution for Android users, having fully replaced Google Pay on that platform.
For Android users with NFC-capable devices, Google Wallet offers a streamlined way to make purchases without physical cards. The application requires Android 7.0 or higher, with Android 9.0 or later recommended for full tap-to-pay functionality. Users must also ensure their device meets Google Play Protect security standards and has a screen lock enabled. These requirements help protect sensitive payment information during transactions.
This guide covers the complete setup process, payment methods, security features, and troubleshooting steps for Google Wallet. Whether adding your first card or resolving common issues, the information below provides practical guidance based on official documentation and verified sources.
How Do I Set Up Google Wallet?
Setting up Google Wallet involves configuring your Android device to support NFC payments and adding payment methods through the app. The entire process typically takes under five minutes on a compatible device. Below is an overview of the key requirements and initial setup steps.
Device and Compatibility Overview
Key Insights for New Users
- Google Wallet requires NFC-enabled Android devices running Android 7.0 (Nougat) or higher, with Android 9.0+ recommended for the best tap-to-pay experience.
- The app uses Host Card Emulation (HCE) technology to communicate with payment terminals without revealing actual card numbers.
- All devices must pass Google Play Protect certification; rooted phones, custom ROMs, or unlocked bootloaders are not supported.
- A screen lock (PIN, pattern, password, fingerprint, or face unlock) is mandatory before making payments.
- The service is free to use with no transaction fees from Google for standard payments.
- Google Wallet has fully replaced Google Pay on Android for NFC contactless payments.
Google Wallet Quick Facts
| Fact | Details |
|---|---|
| Original Launch | 2008 (original service); 2022 (modern app relaunch) |
| Platform Reach | Available in 150+ countries |
| Device Requirements | NFC-enabled Android 7.0+ with HCE support |
| Security Method | Tokenization (real card numbers never shared) |
| Usage Fees | None for basic functionality |
| Wear OS Support | Available on Wear OS 2.x and later |
| iPhone Compatibility | No native app; browsers limited functionality only |
| Default App | Must be set as contactless payment default |
Required Setup Steps
Begin by enabling NFC on your device. Navigate to Settings, then Connected devices, then Connection preferences, and turn on NFC. This wireless technology is the foundation for all contactless payments through Google Wallet.
Next, set Google Wallet as your default contactless payment app. Return to Settings, find the NFC settings, and select Contactless payments. Choose Google Wallet from the available options. This prevents conflicts with other payment apps like Samsung Wallet.
Add your payment cards by opening the Google Wallet app and tapping the “+” button. You can enter card details manually or scan the card using your phone’s camera. Your bank will send a verification code via SMS or email, which must be entered to complete the process. Only cards that support contactless payments can be added.
Configure your screen lock before attempting any payments. Go to Settings, then Security & privacy, and set up a screen lock using your preferred method: PIN, pattern, password, fingerprint, or face unlock. This security measure protects your payment information if your phone is lost or stolen.
Verify that your device is Play Protect certified. Open the Google Play Store, tap your profile, go to Settings, then About, and confirm Play Protect status. Devices that have been rooted or run custom software will not pass certification and cannot use Google Wallet for payments.
Google Wallet requires devices that meet specific security standards. Phones with unlocked bootloaders, custom ROMs, or root access will not function with the payment system. Always check your Play Protect status in the Play Store app if you experience issues adding cards.
How Do I Add and Manage Cards in Google Wallet?
Adding payment cards to Google Wallet is a straightforward process, but users should verify their card is compatible before attempting to add it. Most Visa, Mastercard, American Express, and Discover cards issued by participating banks work with the service. Some prepaid cards and cards from non-participating financial institutions may not be supported.
Adding Payment Cards
Open the Google Wallet app and locate the “+” button, typically positioned prominently on the main screen. Tap this button to begin adding a new card. You will be prompted to either scan your card using the camera or enter the card number, expiration date, and CVV manually.
After entering card details, your bank will initiate a verification process. This usually involves sending a one-time code via SMS or email to the contact information on file with your bank. Enter this code in the Google Wallet app to confirm your identity and link the card to your account.
Once verified, the card appears in your wallet with a status indicator showing whether it is ready for tap-to-pay. Some cards may show as “ready to tap” immediately, while others might require additional verification or bank approval before full functionality is available.
Removing Cards
To remove a card from Google Wallet, open the app and select the card you wish to delete. Look for the card options menu, often accessible through a three-dot icon or similar interface element. Choose the option to remove or delete the card.
Confirm the removal when prompted. The card will be removed from your wallet and will no longer be available for payments. This action does not cancel your physical card; it only removes the digital representation from Google Wallet.
Setting a Default Card
When multiple cards are stored in Google Wallet, you can designate one as the default for payments. Open the app, select your preferred card, and look for an option to set it as default or primary payment method. The default card will be automatically selected when you approach a payment terminal.
You can change the default card at any time by following the same steps. Some users prefer to keep a specific card as default while occasionally switching to other cards for rewards programs or specific purchases.
Organize your cards by priority in Google Wallet. Keeping your most-used payment card at the top of the list reduces steps during checkout, especially for quick purchases where time matters.
How Do I Use Google Wallet for Payments and Passes?
Google Wallet serves two primary functions: enabling contactless NFC payments at physical terminals and storing digital passes such as loyalty cards, transit tickets, and event admissions. Understanding how both functions work helps you get the most from the application.
Paying In Stores with NFC
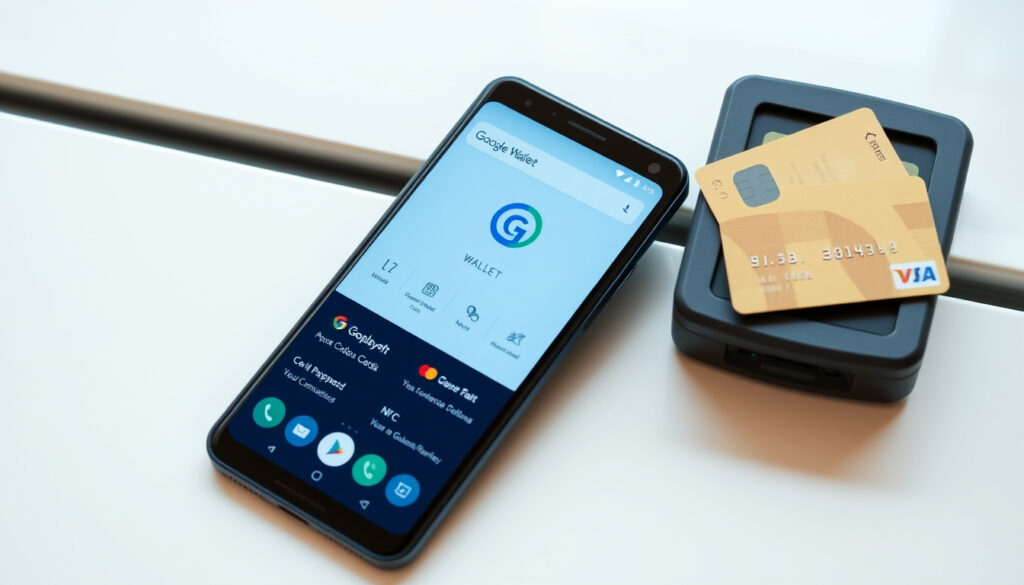
To pay with Google Wallet in a store, first ensure your phone screen is unlocked. Hold the back of your phone near the contactless payment terminal, typically identified by the contactless symbol (four curved lines resembling wifi waves). The NFC antenna is usually located near the top or center of Android phones.
When the phone detects the terminal, Google Wallet will activate and transmit payment information. You may need to confirm the transaction using your fingerprint, PIN, or other authentication method depending on your security settings. A confirmation message or sound indicates the payment was successful.
Works at any terminal displaying the contactless payment symbol or the Google Pay logo. Not all terminals support NFC contactless payments, so having a physical card available as backup is advisable. The app shows a “ready to tap to pay” status for each card to confirm functionality.
Managing Digital Passes
Beyond payment cards, Google Wallet stores various passes including loyalty cards, transit passes, boarding passes, and event tickets. Add these passes the same way you add payment cards: tap the “+” button and select the appropriate pass type or scan a barcode.
Digital passes appear in the main wallet view alongside your payment cards. Tap a pass to display its barcode or QR code for scanning at applicable locations. Some passes automatically update with new information, such as loyalty points or transit balance.
Transit pass functionality varies by region and transit authority. Users in areas with compatible systems can add transit cards directly to Google Wallet and use their phone for fare payment. Check with your local transit authority for specific compatibility information.
Finding Your Passes
All passes stored in Google Wallet appear on the main screen of the app organized by type. Payment cards appear first, followed by transit passes, loyalty cards, and tickets. Swipe or scroll through the interface to locate specific passes.
The search function within the app can help locate specific passes when many are stored. Some users organize passes by adding them to collections or favorites for quick access during regular commutes or shopping trips.
Transit pass support in Google Wallet varies significantly by region. The app supports adding transit passes generally, but specific city transit systems may have limited or no integration. Consult your transit authority’s official resources for regional compatibility details.
Is Google Wallet Safe and How Do I Fix Common Issues?
Google Wallet employs multiple security layers to protect payment information during transactions and while stored on your device. Understanding these protections helps users feel confident when using the service for everyday purchases.
Security Features
Google Wallet never transmits actual credit or debit card numbers during transactions. Instead, the system uses tokenization, replacing real card numbers with unique digital tokens specific to each device and transaction. Even if payment data were intercepted, the tokens would be useless for making other purchases.
Device authentication through screen locks, biometrics, and PINs ensures only authorized users can access payment features. Your phone must be unlocked before payments can be processed, preventing unauthorized transactions if your device is lost or stolen.
Google Play Protect monitors the device for potentially harmful applications and verifies the integrity of the operating system. Devices that fail these security checks, such as rooted phones or those running modified Android versions, cannot use Google Wallet for payments.
Troubleshooting Common Problems
When NFC payments fail to work, the first step is verifying NFC is enabled in your device settings. Navigate to Settings, Connected devices, Connection preferences, and confirm NFC is turned on. Removing thick phone cases can improve NFC connectivity, as some materials interfere with the signal.
Tap-to-pay failures often result from app conflicts. Samsung Wallet users may experience issues if Google Wallet is not set as the default contactless payment app. Access Settings, find NFC settings, and select Google Wallet as the preferred application for contactless payments.
Cards that fail to add usually indicate a bank-related issue. Contact your card issuer to confirm the card supports contactless payments and that there are no account restrictions preventing digital wallet use. Some banks require enabling digital wallet functionality through their own apps or customer service.
App crashes and synchronization issues typically resolve by clearing the app cache, updating the operating system, or reinstalling Google Wallet. Ensure your device meets minimum requirements: Android 7.0 or higher with Host Card Emulation support.
| Issue | Solution |
|---|---|
| NFC not detected | Enable NFC in settings; remove thick cases; restart device |
| Payment declined | Verify screen lock is active; check card support; confirm device unlock |
| Cannot add card | Contact bank for approval; check for security holds; verify card compatibility |
| Default app conflict | Set Google Wallet as default in NFC contactless payment settings |
| App crashes | Clear cache; update OS and app; ensure Android 7.0+ and HCE support |
| Phone not certified | Check Play Store > About for Play Protect status; use stock Android |
Device Certification Requirements
Google Wallet only functions on devices that meet Google security standards. To verify your device status, open Google Play Store, tap your profile, go to Settings, then About, and check the Play Protect certification status. Devices showing as uncertified cannot use Google Wallet for payments.
Common reasons for certification failure include rooting the device, installing custom ROMs, or using Android versions modified by third parties. Restoring the device to factory settings with stock Android usually resolves certification issues.
Google Wallet vs Google Pay: Key Differences
Understanding the relationship between Google Wallet and Google Pay helps clarify what each service offers. The naming and functionality have evolved significantly since the original Google Wallet launch in 2008.
Evolution and Current State
Google Pay launched in 2018 as a unified payment platform, combining earlier services including the original Google Wallet. In 2022, Google Wallet was relaunched as a separate application focused on storing cards, passes, and digital credentials, while Google Pay handled money transfers and transactions.
For NFC contactless payments on Android, Google Wallet now serves as the primary application. Google Pay continues to exist for peer-to-peer transfers and online transactions. Both services share the same backend payment infrastructure, so adding a card to one may automatically make it available in the other.
The functional difference for users making in-store purchases is minimal. Both apps use the same NFC tap-to-pay technology at compatible terminals. The main distinction lies in the additional features: Google Wallet focuses on storage and passes, while Google Pay emphasizes transaction management.
Google Pay legacy settings may still appear in some regions or older devices. This does not affect functionality, as Google Wallet handles all NFC payments regardless of regional differences in app naming or interface.
The Evolution of Google Wallet: A Timeline
Google Wallet has undergone significant changes since its original launch, reflecting broader shifts in digital payment technology and consumer expectations. The service has transformed from a simple payment app into a comprehensive digital wallet platform.
- 2008 — Original Google Wallet service launched, introducing mobile payment concepts to Android users
- 2015 — Integration with Android Pay began, marking the first major platform shift
- 2018 — Transition to Google Pay branding unified payment services under one name
- 2022 — Google Wallet relaunched as a standalone companion app focused on card and pass storage
- 2024 — Added support for digital car keys and expanded digital ID capabilities in select regions
The platform continues to expand its features, with regular updates adding support for new pass types and regional compatibility. Users should keep the app updated through the Google Play Store to access the latest functionality.
What We Know for Certain and What Remains Unclear
Based on official documentation and verified sources, certain aspects of Google Wallet are well-established, while others remain subject to regional variation or ongoing development.
| Confirmed Information | Uncertain or Region-Dependent |
|---|---|
| Universal NFC payments on certified Android devices | iOS full app support: browser-only functionality confirmed |
| Secure tokenization verified by Google | Transit integration: varies by city and transit authority |
| Free core features with no Google transaction fees | Future feature announcements: ongoing development expected |
| Device certification through Play Protect required | Digital ID expansion timeline for specific regions |
Confirmed Security Standards
Google has documented that all NFC payments use tokenization technology that never exposes actual card numbers. Device authentication through screen locks and biometrics is mandatory on certified devices. These security measures meet industry standards for contactless payments.
Area of Uncertainty
Full iOS support remains unavailable. iPhone users can access Google Wallet through web browsers with limited functionality, but the native app experience available on Android is not supported. Users seeking full Apple Wallet integration should use Apple Pay instead.
Understanding Google Wallet in the Digital Payment Landscape
Google Wallet represents Google’s vision for digital wallet functionality on Android devices, competing with Apple Wallet on iOS and Samsung Wallet on Samsung devices. The service occupies a specific position in the broader digital payment ecosystem that continues to evolve rapidly.
The distinction between storing passes and executing transactions reflects broader industry trends toward separating wallet functionality from payment processing. This separation allows users to maintain digital copies of all their cards and passes in one place while choosing different services for actual payment execution.
As contactless payment adoption grows, Google Wallet serves as the Android ecosystem’s primary digital wallet solution. The service benefits from integration with the broader Google ecosystem, including Play Protect security and Play Store update distribution.
What Sources Say About Google Wallet
“Google Wallet lets you keep your cards, tickets, passes, and more securely in one place on your Android phone.”
“Store cards, tickets, and more securely” — Google Wallet product description emphasizes the storage and security aspects that differentiate the service from pure payment applications.
Official Google support documentation confirms that NFC payments require compatible hardware and software configuration, with security certification through Play Protect serving as the baseline requirement for all payment functionality.
Ready to Get Started with Google Wallet
Google Wallet provides Android users with a free, secure method for contactless payments and digital pass storage. The setup process takes under five minutes on compatible devices, requiring only NFC activation, default app configuration, and card addition through the app.
For those new to digital payments, starting with Google Wallet means gaining experience with NFC technology in a controlled, secure environment backed by Google’s security infrastructure. The tokenization system ensures your actual card numbers remain protected during every transaction.
To begin, download Google Wallet from the Google Play Store, enable NFC in your device settings, and add your first payment card. Explore the additional pass storage features to replace physical cards with digital versions for loyalty programs, transit, and events. Like managing your banking needs, exploring options like the Open Bank Account Online NZ guide can help you understand the broader financial technology landscape while adopting new digital payment methods.
Frequently Asked Questions
How do I set up Google Wallet for the first time?
Download Google Wallet from Google Play Store, enable NFC in device settings, set it as your default contactless payment app, and add cards through the in-app “+” function.
What devices support Google Wallet?
Android devices running Android 7.0 or higher with NFC and Host Card Emulation support. Android 9.0+ is recommended for full functionality. Wear OS watches version 2.x and later also support the app.
Is Google Wallet safe to use?
Yes. Google Wallet uses tokenization to protect card numbers, requires device authentication through biometrics or PINs, and only works on Play Protect certified devices.
Why is my Google Wallet not working?
Common causes include NFC not enabled, app not set as default payment app, screen lock not configured, or device not meeting certification requirements. Check settings and restart the device if issues persist.
How do I add a credit card to Google Wallet?
Open Google Wallet, tap the “+” button, scan or enter your card details, and complete bank verification via SMS or email code. Only contactless-compatible cards from participating banks are supported.
What’s the difference between Google Wallet and Google Pay?
Google Wallet stores cards, passes, and digital credentials, while Google Pay handles money transfers and transactions. Both now serve distinct purposes on Android, with Google Wallet handling NFC contactless payments.
Does Google Wallet work on iPhone?
No native Google Wallet app exists for iPhone. iOS users have limited access through web browsers but should use Apple Wallet for full digital wallet functionality.
Can I use Google Wallet for transit passes?
Transit pass support varies by region. Google Wallet supports adding transit passes generally, but specific transit systems may not be compatible. Check with your local transit authority for details.
Is Google Wallet free?
Yes, Google Wallet is free to download and use. There are no fees from Google for adding cards, storing passes, or making NFC payments.
How do I remove a card from Google Wallet?
Open Google Wallet, select the card you want to remove, access the card options menu, and choose to remove or delete it. Confirm the action when prompted.
More related posts
 144 USD to NZD: Current Rate, Trends & Travel Tips
 View Instagram Stories Anonymously: Free Tools & Risks
 Who Is Charlie Kirk? TPUSA Founder and Trump Ally Dies at 31
 Tiffany and Co Necklace: Prices, Resale Value Guide
 Country Starting with O: Oman and Rare Letter Facts
 Famous People from New Zealand: Top Kiwi Icons & Celebrities
 Teacher Aide Jobs Christchurch: Pay, Requirements & Hours